Struggling with tricky wardrobe pulley installations? A small mistake can cause big problems and costly delays. Following a clear, precise method guarantees a smooth-gliding door and a happy customer.
Installation involves fixing one frame, placing the door, adding the second frame, then securing the seals and pulleys with screws. The key is to insert the pulley spring correctly and use traction screws to secure the bottom pulley in its track for a perfect fit.
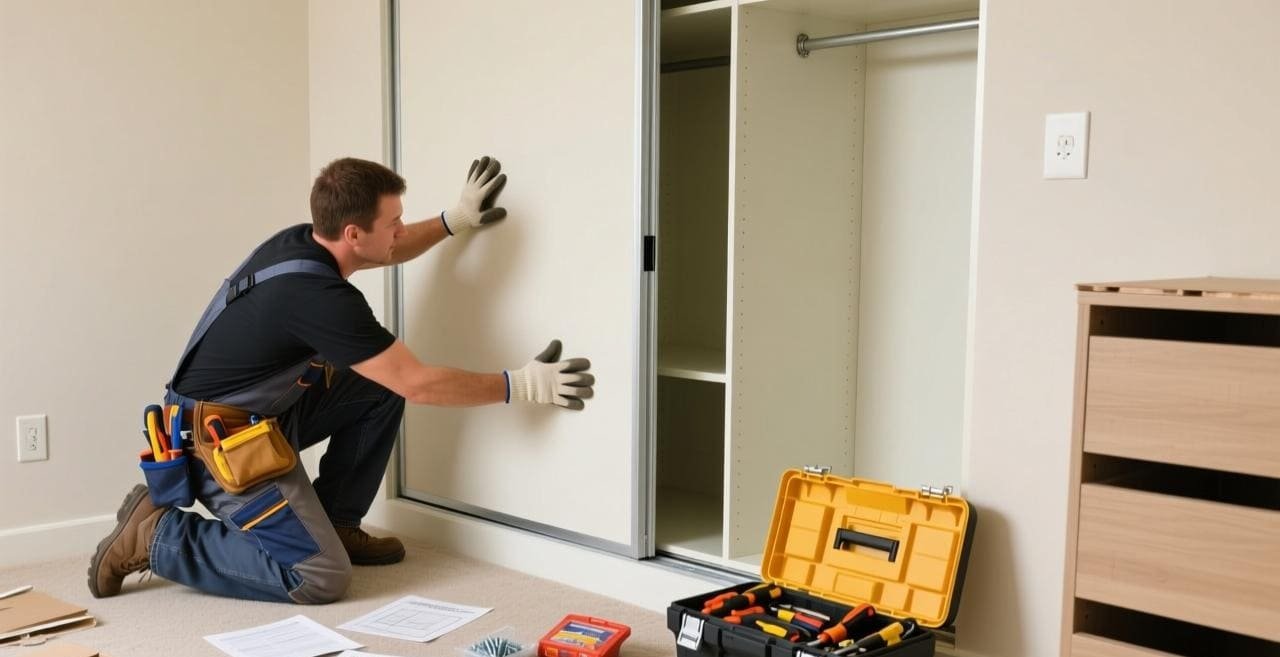
That’s the basic overview. But getting it right means understanding the details. A smooth-gliding door is a sign of quality, something your customers will notice immediately. It shows your attention to detail and commitment to a professional finish. Let’s break down the process and explore other common questions about pulleys to make you an expert in your field. This knowledge will help you select and install the best hardware for any project.
What kind of cable is best for a pulley system?
Choosing the wrong cable can lead to snapping or stretching. This compromises the entire pulley system’s safety and function. Let’s ensure you select the right material for lasting performance.
For simple pulley systems, a sturdy, low-stretch line like a synthetic polymer cord works well. For heavy-duty applications like large doors or our linkage door systems, steel cables offer superior strength and durability, preventing sag and ensuring long-term reliability. This is the professional standard.

While a simple question, the answer depends entirely on the application. In my line of work at opensliding, we deal with components that must last for decades under daily use. The choice of "line" or cable is critical. For light-duty, non-critical tasks, you have more options. For professional door and furniture systems, the choice is clear.
Material Comparison for Pulley Lines
| Material | Best For | Pros | Cons |
|---|---|---|---|
| Natural Fiber (e.g., Cotton) | Light decorative tasks | Aesthetically pleasing, low cost | Prone to stretch, rot, low strength |
| Synthetic Polymer (e.g., Nylon)1 | General utility, outdoor use | Strong, weather-resistant | Can have some stretch |
| Braided Polyester | Heavy loads, low stretch needs | Very strong, low stretch, durable | Higher cost than basic synthetics |
| Steel Cable2 | Heavy doors, industrial use | Highest strength, no stretch, durable | Less flexible, requires special fittings |
For any project involving heavy sliding panels, like partition doors or large wardrobe systems, I always recommend a system engineered with steel cables or high-grade rollers that don’t rely on cables at all. The integrity of the system depends on materials that won’t fail, stretch, or degrade. That is how you build a reputation for quality.
How do you install a basic pulley system?
Installing a simple pulley seems easy, but incorrect placement can cause friction and failure. This can damage the mounting surface and the system itself. Let’s cover the basic principles for a flawless setup.
First, securely mount the pulley brackets to a solid structure like ceiling joists or wall studs, never just drywall. Thread the line through the pulleys. Ensure the line is taut but not over-stressed. Test the movement to check for smoothness and alignment before applying any load.

The principles of a basic pulley installation are universal, but the application is what separates a DIY project from a professional hardware installation. Here are the core steps.
Step 1: Locating Secure Mounting Points
The most critical step is ensuring your anchor points are solid. The pulley multiplies force, so the stress on the mounting bracket is significant. You must locate a wooden stud, joist, or concrete support. Using a stud finder is essential. For our heavy-duty door systems, the entire top track acts as the mounting point, and it must be fastened securely into the building’s frame.
Step 2: Fixing the Brackets and Pulleys
Use appropriate fasteners for the material you are mounting to. For wood, use heavy-gauge wood screws. For concrete, use anchor bolts. The pulley or bracket must sit completely flush against the surface to prevent wobbling, which causes premature wear.
Step 3: Threading and Tensioning
This is where professional systems differ greatly. In a simple setup, you just thread the rope. In our advanced systems, like a linkage door system, the cable must be threaded in a precise pattern and tensioned correctly to ensure all doors move in perfect sync. This often involves specialized tensioning mechanisms3 built into the hardware. It’s a level of precision far beyond a simple pulley.
Where to put a wardrobe pulley?
Placing a wardrobe pulley in the wrong spot can ruin the door’s balance. This leads to jamming, uneven wear, and a frustrating user experience for your client. Let’s pinpoint the exact location for perfect function.
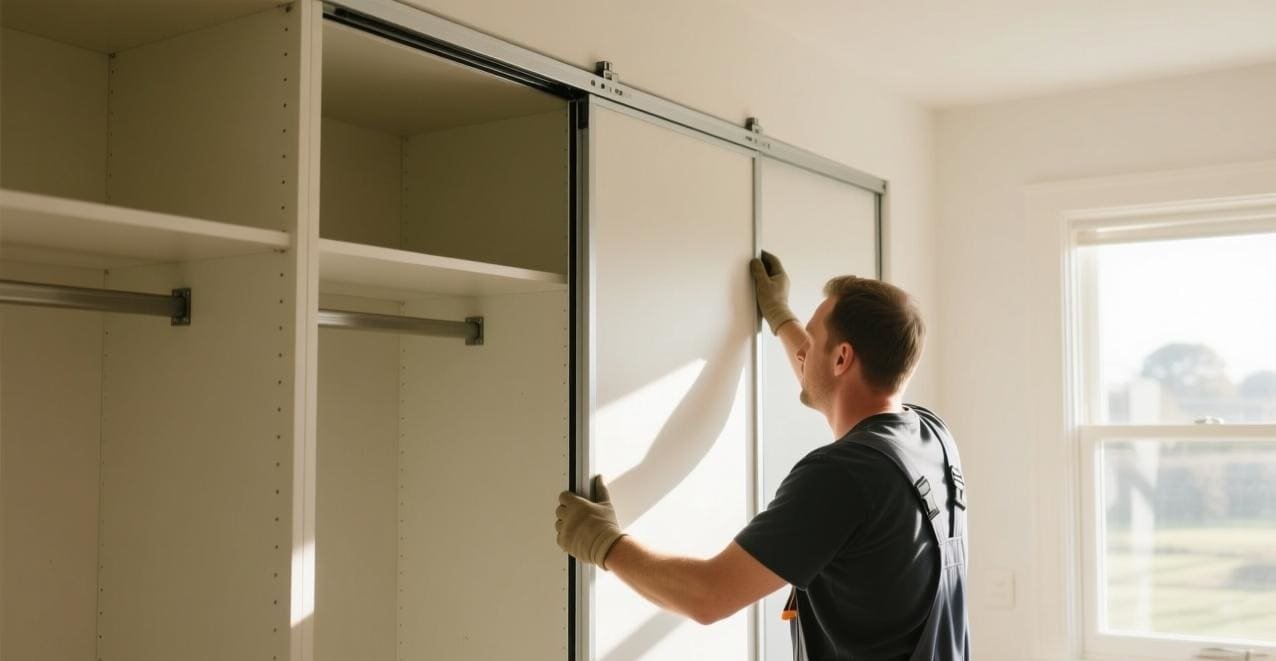
The wardrobe pulleys, or rollers, are installed into recessed housings at the top and bottom corners of the sliding door panel. The top rollers guide the door in the upper track, while the bottom rollers bear the weight and run along the lower track for stability.
The correct placement of rollers is non-negotiable for smooth operation. In my years of manufacturing these systems, I’ve seen many installation errors that could have been avoided by understanding the function of each component.
Top Roller Placement
The top rollers4 are primarily for guidance and stability. They sit inside the top track and keep the door from tipping forward or backward. They are typically installed in pre-machined recesses at the top two corners of the door. In many of our systems at opensliding, these top rollers4 are spring-loaded. This makes installation easier, as you can depress them to pop the door into the track, and they also provide constant contact with the track for quieter operation.
Bottom Roller Placement
The bottom rollers5 are the workhorses. In most standard wardrobe systems, these rollers bear the full weight of the door. They must be installed directly below the top rollers4, in the bottom two corners. This alignment is critical for even weight distribution. Misalignment will cause the door to drag and will wear out the rollers and track quickly. Many of our high-quality bottom rollers5 feature a height adjustment screw. This is a crucial feature that allows you to perfectly level the door after installation, compensating for any minor imperfections in the floor.
What are the key steps for installing a professional wardrobe pulley?
You have the quality parts, but the instructions seem unclear. A poor installation can damage a high-quality door system before the client ever uses it. I will provide the clear guide you need for a professional result.
The process is methodical: fix one side frame, place the door panel, attach the second frame, and secure the seals. Then, carefully install the upper and lower pulleys into their housings with screws, ensuring the spring mechanism is engaged correctly for smooth operation.
Based on my experience on the factory floor, I have a specific process that ensures a perfect fit every time. This method works especially well for sliding doors that are assembled within a frame before being installed.
Step 1: Prepare the Door and Frame
Lay one side of the door frame on a protected, flat surface. Carefully place the main door panel6 into this frame. Now, take the second frame piece and place it on top, enclosing the door panel6.
Step 2: Secure the Frame and Seals
Align all corners perfectly. Begin fixing the frame together with screws. As you secure the frame, attach the bottom and side seals. These are often forgotten but are critical for a clean look and to protect the door’s edges.
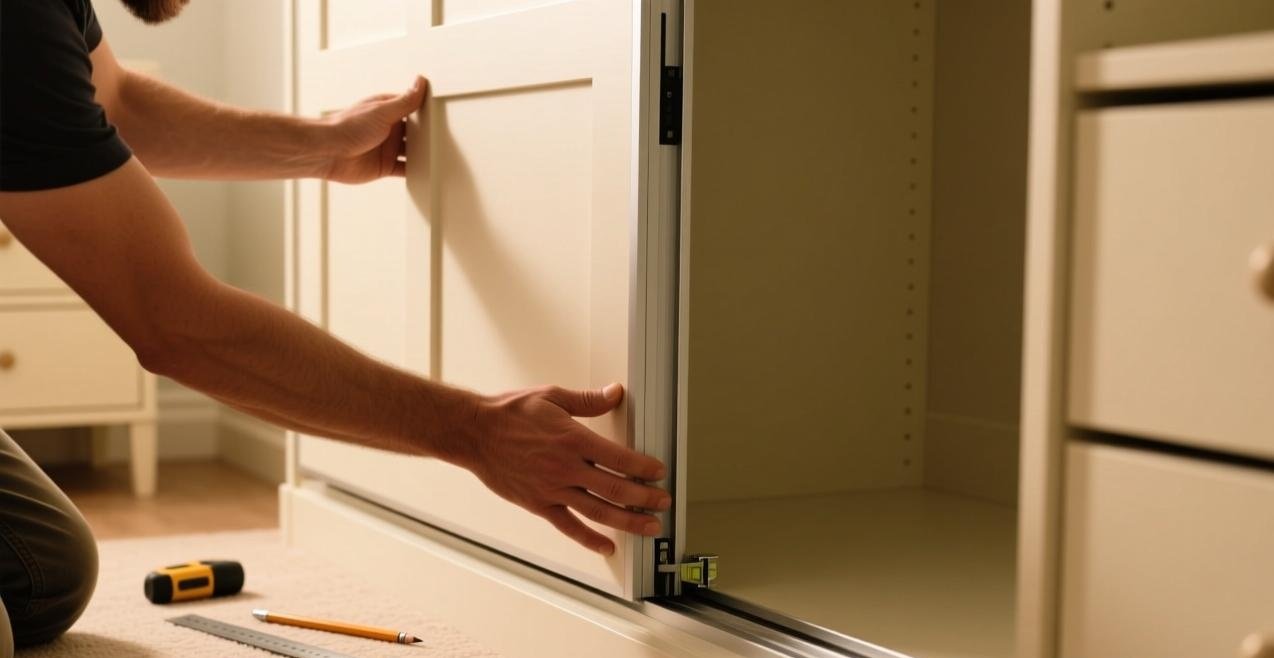
Step 3: Install the Pulleys (Rollers)
This is the most important step. The rollers are fixed into their designated housings at the same time you are securing the frame. Pay close attention to the spring on the pulley; it must be installed so that it can be depressed. This spring allows the roller to retract for installation and provides upward pressure for smooth rolling.
Step 4: Final Securing
Once the rollers are in place, use the final traction screws to fully secure the roller assembly7 within the door frame. These screws provide the final, solid connection. With the door now fully assembled, you can lift it and set the bottom rollers into the floor track, then pop the top rollers into the top track. Test the glide and make any height adjustments as needed.
What are the correct terms for door and wardrobe pulleys?
Using the wrong term when sourcing parts can lead to ordering the wrong items. This wastes your time and money on shipping and returns. Let’s clarify the industry terminology so you can communicate confidently.
While a "clothes pulley" is often called a clothes airer, in the furniture and door industry, these components are called rollers, wheels, or sheaves. They are part of a larger sliding door system, track system, or roller assembly. Using the correct term gets you the right part.

As a manufacturer who exports globally, clear communication is everything. For my B2B clients like Jacky in Canada, using the right terms ensures we are talking about the same component. This prevents costly errors in purchasing. Here is a simple breakdown.
Industry Terminology Glossary
| Common Term | Industry Term | System Name |
|---|---|---|
| Pulley, Wheel | Roller, Sheave, Carriage | Wardrobe Sliding Wheels System |
| Top Guide | Upper Roller, Guide Roller | Partition Room Sliding Door System |
| Bottom Wheel | Bottom Roller, Weight-Bearing Roller | Cabinet Sliding Door Roller System |
| Sliding Thingy | Sliding Mechanism, Roller Assembly | Heavy Duty Sliding Door Hardware |
Understanding this difference is key. When you search for a "wardrobe pulley," you might get results for laundry equipment. When you search for a "wardrobe roller system8," you get professional hardware results. Furthermore, knowing the difference between a top-hung system9 (where the top rollers bear all the weight) and a bottom-rolling system (where the bottom rollers bear the weight) is crucial for specifying the correct hardware for your project’s structural requirements. At opensliding, we offer a huge range of these systems, and I’m always happy to help clients like you choose the perfect one.
Conclusion
Proper installation is crucial for smooth-gliding doors. Mastering the steps, terms, and placement ensures a high-quality finish, reflecting the excellence of your work and our hardware.
Explore the advantages of Synthetic Polymer for pulley lines, including its strength and weather resistance, ideal for various applications. ↩
Discover why Steel Cable is the top choice for heavy sliding panels, offering unmatched strength and durability for reliable performance. ↩
Exploring tensioning mechanisms will enhance your knowledge of advanced systems, ensuring optimal performance and longevity. ↩
Explore this link to understand how top rollers enhance stability and ease of installation in sliding doors. ↩ ↩ ↩
Learn about the critical role of bottom rollers in weight distribution and door leveling for optimal sliding door performance. ↩ ↩
Explore this link to learn expert tips and techniques for a flawless door panel installation. ↩ ↩
This resource provides detailed guidance on securing roller assemblies, ensuring smooth door operation. ↩
Explore this link to understand the benefits and features of wardrobe roller systems for your projects. ↩
Learn about top-hung systems to make informed decisions for your sliding door hardware needs. ↩