Is your sliding glass door sticking, dragging, or feeling heavy? This is a common frustration for many. Thankfully, a simple roller adjustment is often all that you need.
To adjust sliding door rollers, find the adjustment screws on the bottom or side edge of the door. Use a screwdriver to turn them, raising or lowering each corner. Your goal is to level the door in its frame so it slides smoothly without scraping the track.
Adjusting rollers sounds simple, and it usually is. But knowing the specific signs to look for, how to perform the adjustment correctly, and when a replacement is necessary will save you a lot of headaches. As a manufacturer of these components at opensliding, I’ve seen it all. Let’s walk through the process together to get your doors gliding like new.
What Are Common Signs You Need to Adjust or Replace Rollers?
Not sure if the rollers are really the problem? Guessing can waste time and lead to bigger issues. Look for these clear signs that your rollers need attention.
Key signs include the door sticking or dragging, making scraping or grinding noises, and being difficult to lock. Also, check for a visible gap at the top or bottom, which shows the door is no longer level. These are classic symptoms of roller problems.
In my factory, we analyze hardware failures to improve our designs. The feedback we get from contractors and distributors always points back to a few core indicators. You can diagnose your own doors by paying attention to these same details. It’s about using your eyes, ears, and hands to find the source of the problem.
What to Listen For
A healthy sliding door1 is nearly silent. If you hear grinding, scraping, or squeaking, that’s your first clue. Grinding often means the roller’s ball bearings are shot or the wheel is broken and scraping against the metal track. A scraping sound could mean the door has dropped so low that the door frame itself is dragging.
What to Look For
A visual inspection2 is critical. Get down to track level and look at the gap between the bottom of the door and the track. Is it even all the way across? Then check the vertical gap between the door and the jamb. If the door hangs crooked, the rollers are uneven. Also, try to peek under the door with a flashlight to see the rollers. Obvious signs of trouble include cracked wheels, rust, or a build-up of dirt and grime.
How it Feels
The feel of the door is your final clue. It should slide with minimal effort. If you have to muscle it open or closed, the rollers are struggling to do their job. Another big sign is difficulty locking the door. If the latch doesn’t line up with the strike plate in the jamb, it’s almost always because the door has sagged due to a failed roller.
How Do You Adjust Sliding Door Rollers?
So you’ve identified a roller issue. The door is crooked or dragging. Before you assume they need replacing, a simple adjustment can often solve the problem completely.
First, locate the two adjustment screw access holes on the bottom of the door. Use a Phillips screwdriver to turn the screws. Clockwise typically raises the door, and counter-clockwise lowers it. Adjust each side until the door is level and slides smoothly.
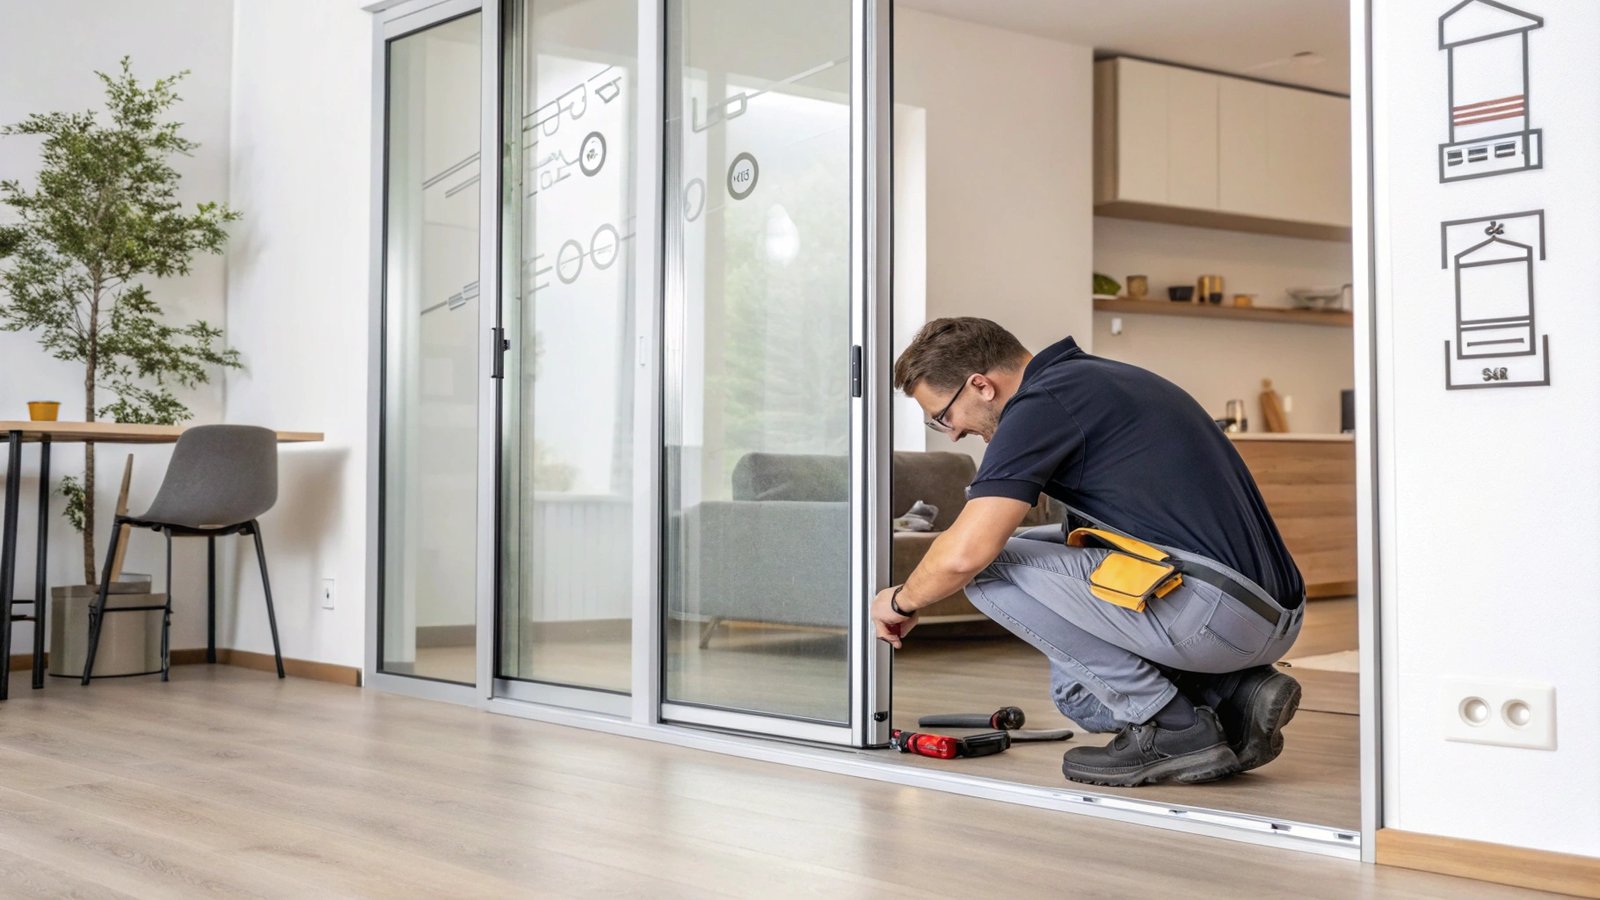
Performing this adjustment correctly is key. I always advise our B2B clients, like Jacky in Canada who buys in bulk, to train their installers on this simple procedure. Getting it right prevents callbacks and ensures the end-user is happy. The goal is to distribute the door’s weight evenly across both rollers.
| Step | Action | Purpose |
|---|---|---|
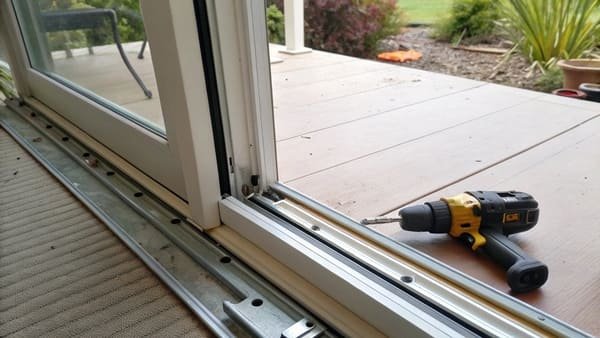
| 1. Clean the Track | Use a vacuum and a stiff brush to remove all dirt and debris from the track. | Debris can mimic the symptoms of bad rollers and prevent a smooth slide. |
| 2. Locate Screws | Find the small access holes on the bottom of the vertical door frame. They may be covered by plastic plugs. | These holes provide access to the roller height adjustment screws. |
| 3. Adjust the First Side | Insert your screwdriver and turn the screw. Turn it a half-turn at a time and test the door. | You want to raise or lower one corner of the door to make it level. |
| 4. Adjust the Second Side | Move to the other side of the door and adjust the second roller. | The goal is to have an even gap along the bottom and top of the door. |
| 5. Test and Refine | Slide the door back and forth. It should move smoothly without any scraping. Check that the lock engages easily. | Fine-tune the adjustments until the operation is perfect. |
Remember to make small adjustments. A quarter or half turn of the screw can make a big difference. Patience here will pay off.
When Should You Replace the Rollers Instead of Adjusting?
Adjustments aren’t a magic fix for everything. Sometimes, the rollers are simply beyond repair and trying to adjust them is a waste of time. So, how do you know?
You should replace the rollers if the door won’t stay adjusted, the wheels are visibly cracked or broken, or the rollers are seized with rust. If a full adjustment doesn’t fix the problem, the hardware has likely failed and needs replacement.
As a manufacturer, we understand the life cycle of our products. High-quality rollers, like the ones we produce at opensliding, are designed for longevity. However, all mechanical parts eventually wear out, especially in harsh environments with salt air or heavy use. Knowing when to stop adjusting and start replacing is a crucial skill for any contractor or maintenance professional. It saves time and ensures a long-term solution rather than a temporary fix.
Signs Replacement is Necessary
- Visible Damage: If you can see that the roller wheel is cracked, flat on one side, or broken into pieces, no amount of adjustment will help. The component has failed.
- Severe Corrosion: In coastal areas or very damp climates, rust can seize the bearings and the adjustment screw itself. If the roller is a block of rust, it’s time for a new one.
- Adjustment Doesn’t Work: This is the most telling sign. If you adjust the rollers and the door is level, but it sags again after a few uses, the internal mechanism is worn out and can no longer hold the weight.
- Extreme Noise: A worn-out bearing will create a loud grinding or crunching sound. This noise is a clear signal that the roller is destroying itself and needs to be replaced immediately to avoid damaging the track.
How Do You Replace Sliding Door Rollers?
You’ve determined a replacement is needed. While it’s a bigger job than a simple adjustment, it’s very manageable. Doing it yourself can save you significant money.
To replace sliding door rollers, you must remove the door from its frame. Lay it flat, unscrew and remove the old roller assemblies from the bottom corners, install the new ones, and then carefully place the door back onto the track. Finally, adjust the new rollers.
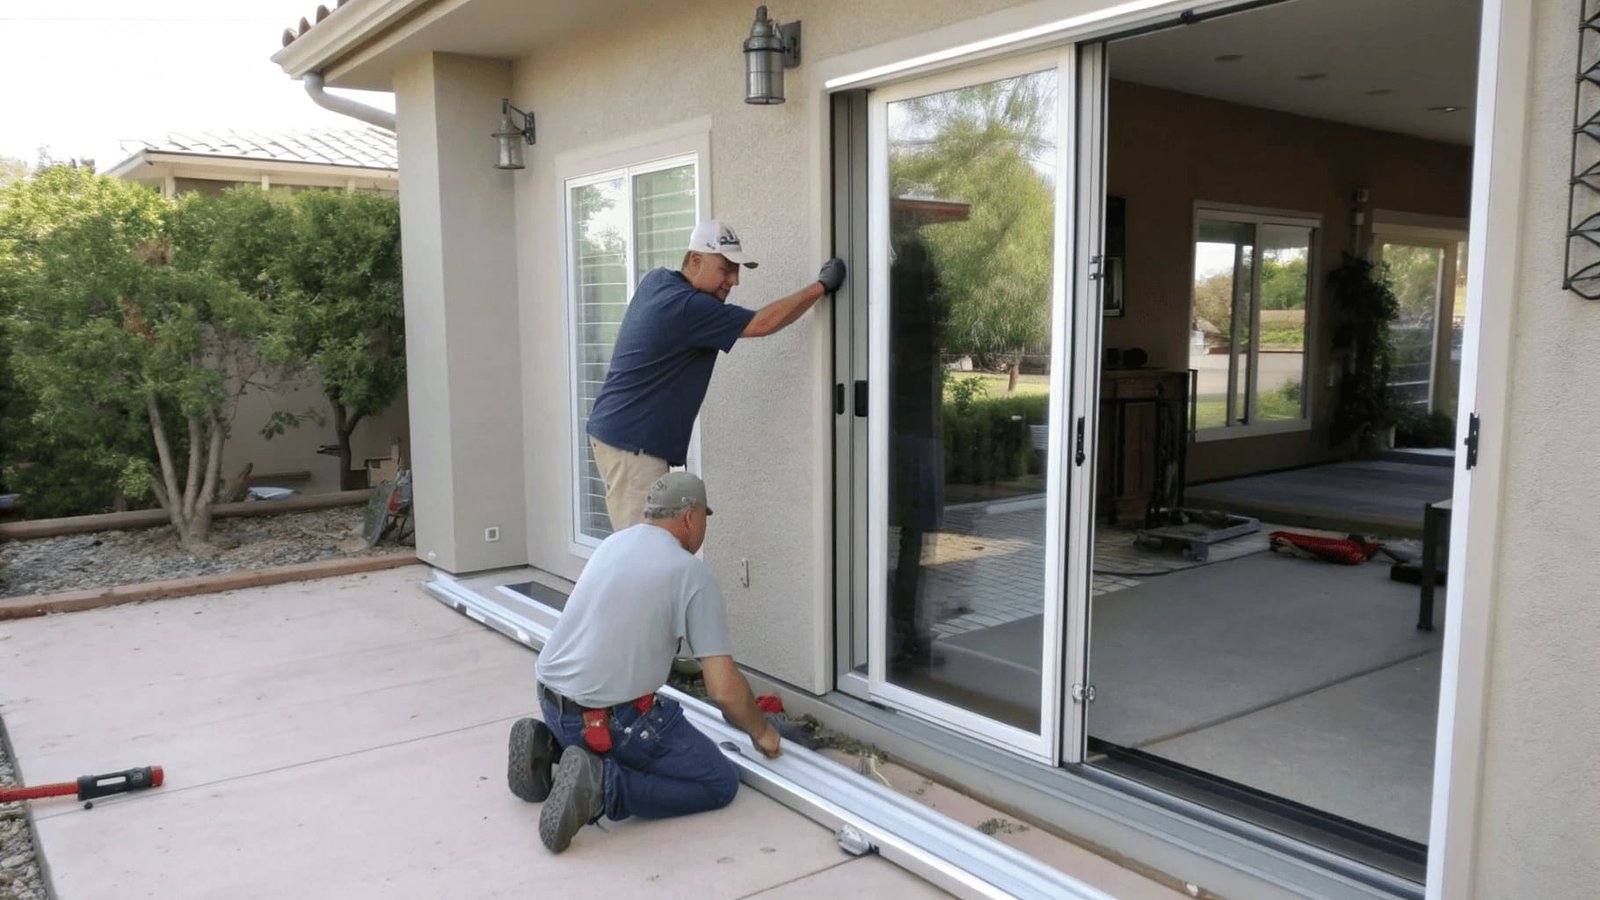
This is a two-person job. Sliding glass doors are very heavy, and attempting to remove one by yourself is dangerous. At opensliding, we package our replacement rollers with clear instructions because we know that a good product is only as good as its installation. For our wholesale partners, providing a reliable, easy-to-install product is a key part of our business.
Step-by-Step Replacement Guide
- Remove the Door: First, check if there’s a fixed panel and remove it if it’s blocking the sliding panel. Then, with a helper, lift the sliding door up into the top channel and pull the bottom out towards you. Carefully carry the door and lay it on its side on a pair of sawhorses.
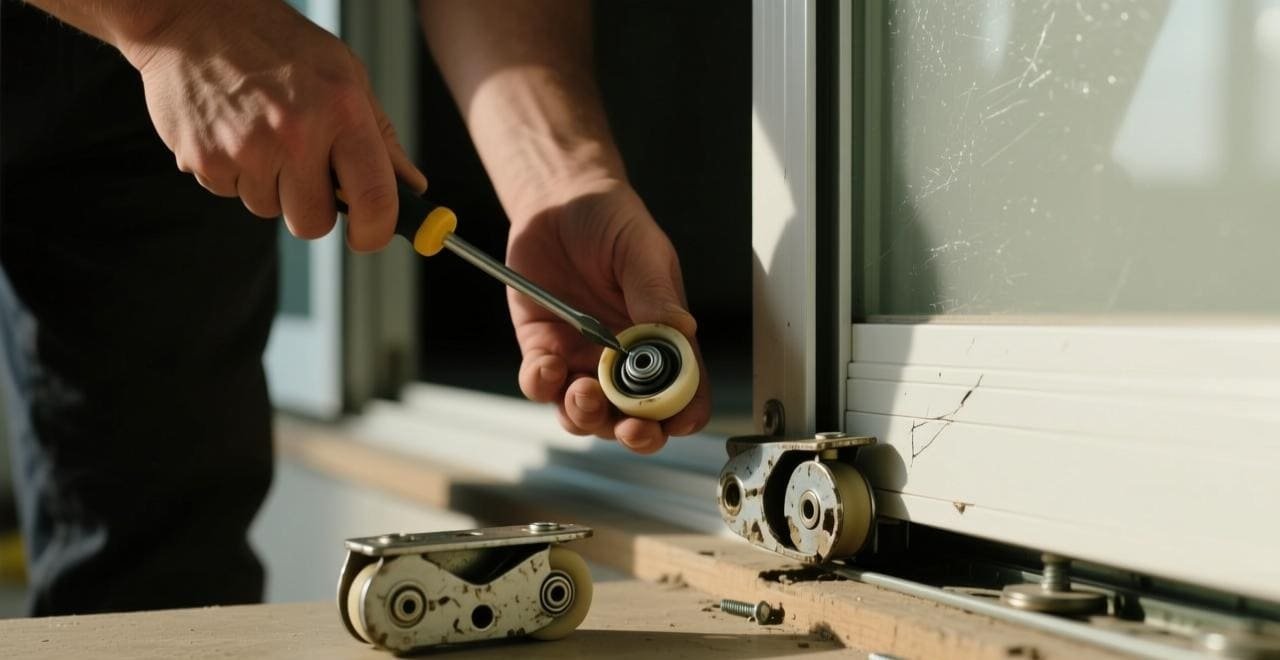
- Access the Old Rollers3: The roller assemblies are located at the bottom corners of the door. They are typically held in place by one or two screws.
- Remove Old and Install New: Unscrew and slide the old roller assembly out. It’s a good idea to take the old roller with you when buying a replacement to ensure you get an exact match. Slide the new roller assembly into the same slot and secure it with the screws.
- Re-install the Door: With your helper, carefully lift the door and reverse the removal process. Seat the top of the door in the upper channel first, then swing the bottom in and lower it onto the track.
- Adjust for a Perfect Fit4: Now that the new rollers are in, follow the adjustment steps from the previous section. Level the door, test the slide, and check the lock. New rollers will make your door feel brand new.
Conclusion
Adjusting or replacing sliding door rollers can transform a frustrating door into one that glides effortlessly. This guide gives you the confidence to tackle the job yourself.
Understanding common sliding door issues can help you maintain your door effectively and avoid costly repairs. ↩
Learning how to conduct a visual inspection can help you identify problems early and ensure your sliding door operates smoothly. ↩
Explore this link to learn effective techniques for replacing old rollers, ensuring your sliding door operates smoothly. ↩
This resource will guide you through the adjustment process, helping you achieve a seamless and functional sliding door. ↩