Struggling with a constantly damp small bathroom? Water everywhere after a shower is frustrating and unsafe. It’s time for a smarter, drier, and more organized solution for your renovation projects.
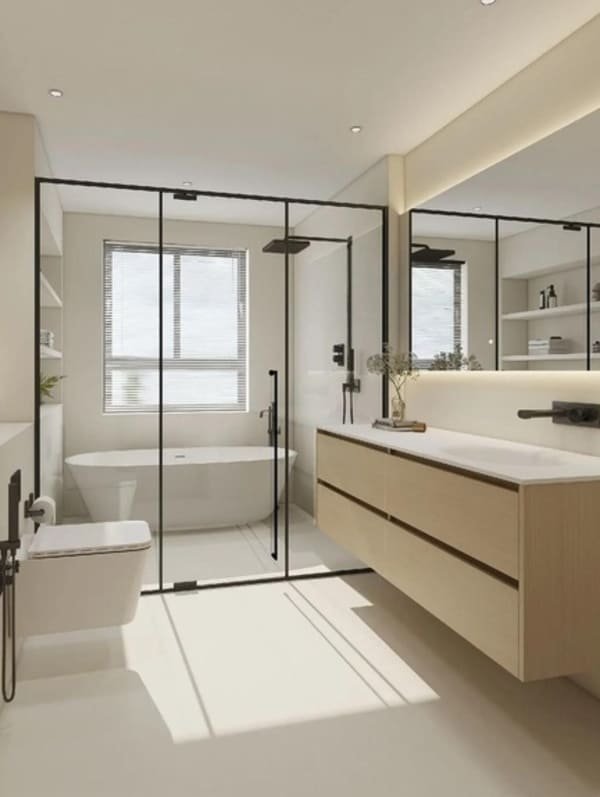
To achieve wet and dry separation in a small bathroom, use a glass shower door or a partition. This physically contains water in the "wet zone" (shower area), keeping the "dry zone" (toilet and vanity) safe, clean, and slip-free for your clients.
As someone who has been manufacturing door hardware for years, I’ve seen countless bathroom plans. A common problem my clients face is making small bathrooms work. The absolute key is separating the wet zone from the dry zone. This sounds technical, but it’s quite simple. Let’s look at how to do this well, even when space is very limited. This single change can make a huge difference in the final project.
How to separate wet and dry bathroom?
Is your client’s bathroom always a wet mess? This creates slipping hazards and makes cleaning a constant chore. You need to create a clear, physical boundary between the shower and the rest of the room.
The best way to separate wet and dry areas is by installing a physical barrier. A shower cubicle, a glass screen, or even a half-wall works perfectly. These solutions effectively contain water, keeping the toilet and vanity areas dry and accessible.

When I talk with purchasers like Jacky, we often discuss how the right hardware defines the space. The core idea is simple: create two distinct zones. The wet zone is the shower and maybe the bathtub. The dry zone holds the toilet and the vanity. The goal is to keep water from the wet zone from getting all over the dry zone. It improves safety, hygiene by reducing mold risk, and makes the room much easier to clean.
Here are the most common solutions I provide hardware for:
Full Shower Enclosures
These provide the best water containment. For small bathrooms, I always recommend our sleek sliding glass door systems. They save critical space because the door doesn’t swing out into the room. We manufacture the rollers and rails to ensure they provide a smooth, quiet glide for years. This is a quality feature that end-users appreciate.
Fixed Glass Panels
This is a simple, minimalist option. A single, stationary glass panel next to the shower head is often enough to stop most splashes. It keeps the bathroom feeling open while still being very practical.
Partition Walls
A partition wall is a more permanent structure, often built from studs and drywall, then tiled. You can build a half-wall and place a glass panel on top. This adds a solid feel and can even create a handy shelf inside the shower. The choice between these options usually comes down to the project’s budget and the desired style.
How to divide a small bathroom?
Feeling cramped in a small bathroom? A poor layout makes the space feel even smaller and more chaotic. Your clients want a design that is both functional and feels spacious.
To divide a small bathroom effectively, use space-saving solutions like corner showers, sliding glass doors, and wall-mounted vanities. These items create clear zones without taking up valuable floor space, making the room feel larger and more organized.

Maximizing every square inch is the name of the game in small bathroom design. The right hardware and layout make all the difference. I often advise my B2B clients to think about the flow of the room. A bathroom that is easy to move around in automatically feels bigger.
Here are some strategies that work well:
Layout Strategies
A linear layout is a great choice for long, narrow bathrooms. You put the toilet, vanity, and shower all along one wall. This layout makes a sliding shower door almost essential. Our soft-close sliding systems are perfect here. They add a touch of luxury by preventing loud bangs and ensure smooth operation. For a purchasing manager, offering a soft-close feature is an easy way to add value.
Corner Showers
Putting the shower in a corner frees up central floor space, which is the most valuable real estate in a small room. A quadrant or neo-angle shower enclosure with sliding or pivot doors is ideal. As a factory, we can produce custom hardware sets for these unique shapes, giving you more design flexibility.
Visual Tricks
Use large mirrors to reflect light and the room itself. This is a classic trick to create an illusion of depth. Using consistent tiling on the floor and walls also helps. A frameless glass shower door is another key element because it avoids creating hard visual barriers. Our minimalist hardware, like small clips and slim rails, complements this look perfectly.
How do you absorb moisture in a small bathroom?
Does the small bathroom you’re working on feel damp and stuffy all the time? This leads to musty smells and potential mold growth, which are major client complaints. You need effective ways to manage moisture.
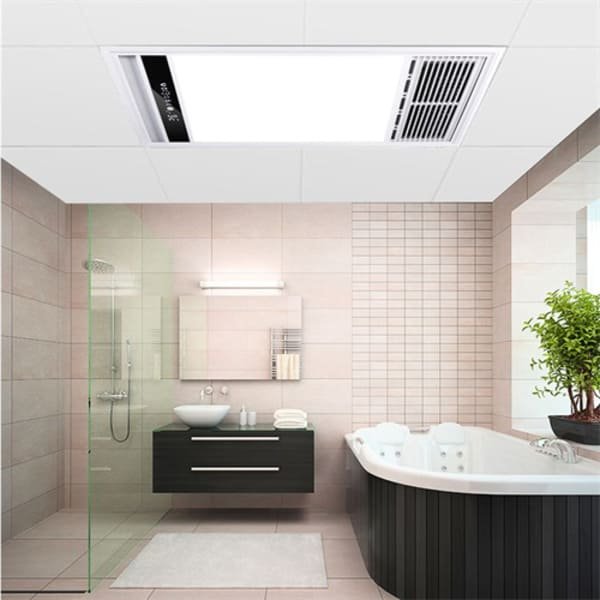
To handle moisture, ensure excellent ventilation with a powerful exhaust fan. You can also use moisture-absorbing materials like microfiber towels and diatomaceous earth mats. Running a dehumidifier after showering can also greatly reduce humidity.
Physical water barriers are the first step, but managing airborne moisture—humidity—is just as important. A dry bathroom is a healthy bathroom. This is about more than just wiping up spills. It is about controlling the air.
Ventilation is Number One
An exhaust fan isn’t optional, it’s essential, especially in a small bathroom with no window. You need a fan with a CFM (Cubic Feet per Minute) rating appropriate for the room’s size. I always tell contractors to advise their clients to run the fan during their shower and for at least 15 minutes after. This pulls the damp air out before it settles.
Material Choices
The right accessories can passively manage moisture.
Material / Product How It Helps Absorb Moisture My Tip for Purchasers Exhaust Fan Actively removes moist air from the room. Choose a model with a high CFM rating and a low sone (noise) level. Diatomaceous Earth Mat A natural stone-like mat that absorbs water from your feet and air-dries very quickly. A great, modern alternative to fabric bath mats that get soggy and can harbor mold. Microfiber Towels Absorb more water and dry faster than traditional cotton towels. A simple upgrade that helps reduce the overall dampness in the room. Dehumidifier A small, portable unit can be run after showers to pull excess moisture from the air. This is an excellent solution for basement bathrooms or any room with persistent humidity problems.
Finally, a simple squeegee to wipe down the shower glass and walls after use is a low-tech but highly effective tool. It removes water before it can evaporate into the air.
What is the golden rule for bathroom layouts?
Planning a new bathroom layout can be overwhelming. One wrong choice can lead to a dysfunctional and awkward space that the end-user will hate. You need a simple rule to guide your design decisions.
The golden rule for bathroom layouts is to prioritize function and flow. Place the most frequently used fixture, the vanity, in the most accessible spot. The toilet and shower can be located further in, with clear pathways between all fixtures.

This "function and flow" rule guides every good bathroom design, from a huge master bath to a tiny powder room. It’s a principle I discuss with clients like Jacky when they are sourcing hardware for a new product line. The hardware must support a good layout, not fight it.
Here are three key rules that support this golden rule:
The Clearance Rule
Every fixture needs adequate "clearance"—the empty space around it—to be used comfortably. Industry standards recommend at least 21-30 inches of clear floor space in front of a toilet and vanity. I always ensure the hardware we supply allows for these clearances.
The Zoning Rule
This brings us back to our main topic: wet and dry zones. Always group wet fixtures (the shower and tub) together and separate them from the dry fixtures (the toilet and vanity). This is the most fundamental part of a functional layout. It dictates plumbing, electrical, and how a person will use the room.
The Door Swing Rule
Pay close attention to the swing of the main bathroom door and the shower door. They should never block each other or prevent access to a fixture. This is exactly why our sliding door systems are so popular. For a main door, a sliding barn door system saves floor space inside and outside the bathroom. For a shower, a sliding door eliminates the blocked space a swing-out door creates. This is a game-changer in small bathrooms and a strong selling point for any distributor or contractor.
Conclusion
In short, achieving wet and dry separation with smart layouts, physical barriers, and moisture control transforms a small bathroom. It creates a safer, cleaner, and more functional space for any project.